- Posts: 45
- Thank you received: 7
Custom captive nuts for 1010 Rail Button Mounting
- hermanjc
-
 Topic Author
- Offline
- Senior Member
-

Less
More
2 years 2 months ago #11007
by hermanjc
Custom captive nuts for 1010 Rail Button Mounting was created by hermanjc
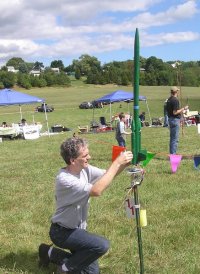
I have been using rail buttons on almost all of my builds (which have been mostly scratch built custom designed rockets). But, I have even gone back to some of my kit builds that are typical rod launchers and adding rail buttons if they are on the larger and on the heavy end. Most of these kits have body tubes BT-55 or smaller, and thus using what I think is the typical mounting solution of a flanged nut introduces issues with warping the tube or having the recovery system get tangled on the nut/screw protruding into the body. Thus I have come up with a way to make a custom conformal captive nut.
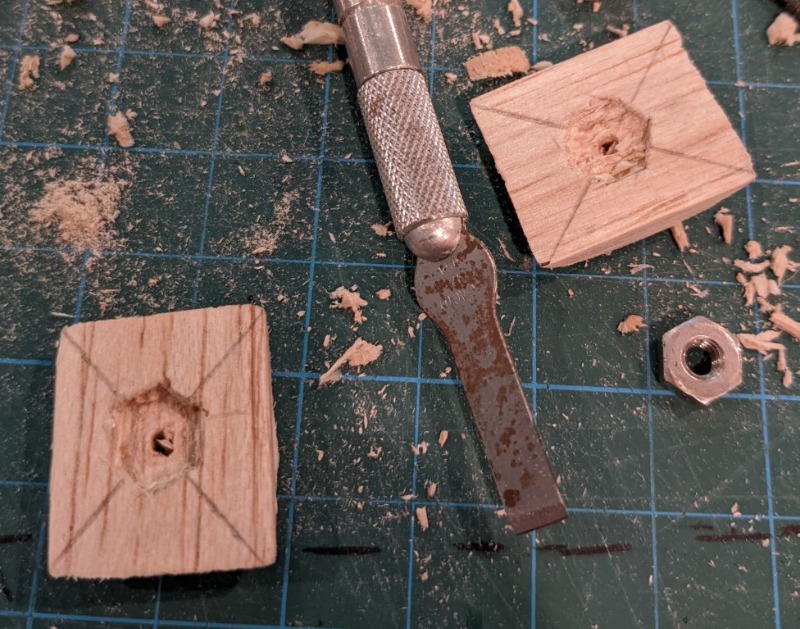
Step 1: Take a 1/4" thick scrap of balsa about 1 inch deep and trace a tube coupler outline on the thin edge of each side.

Step 2: Rough shape the block using an exacto knife to whittle away material close to the line
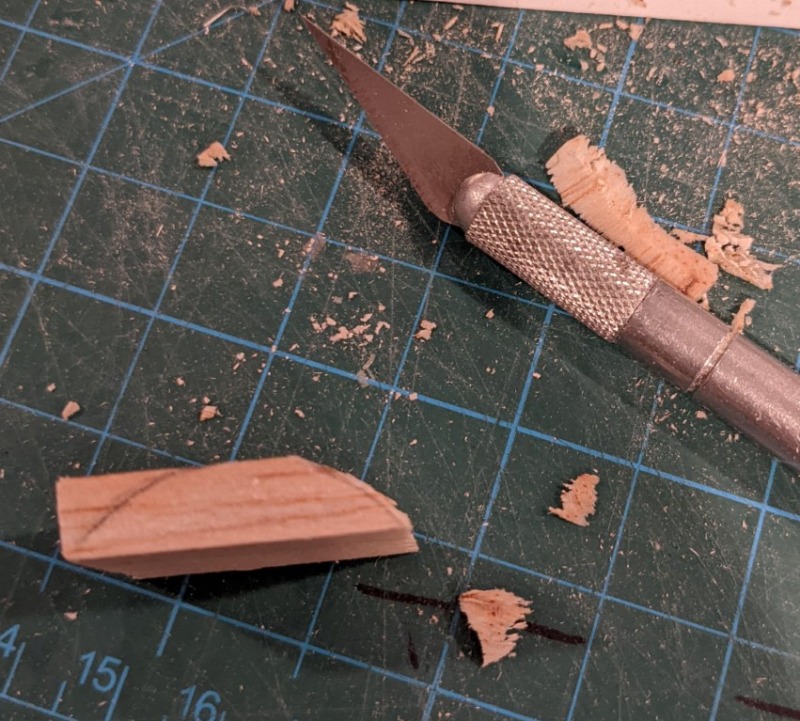
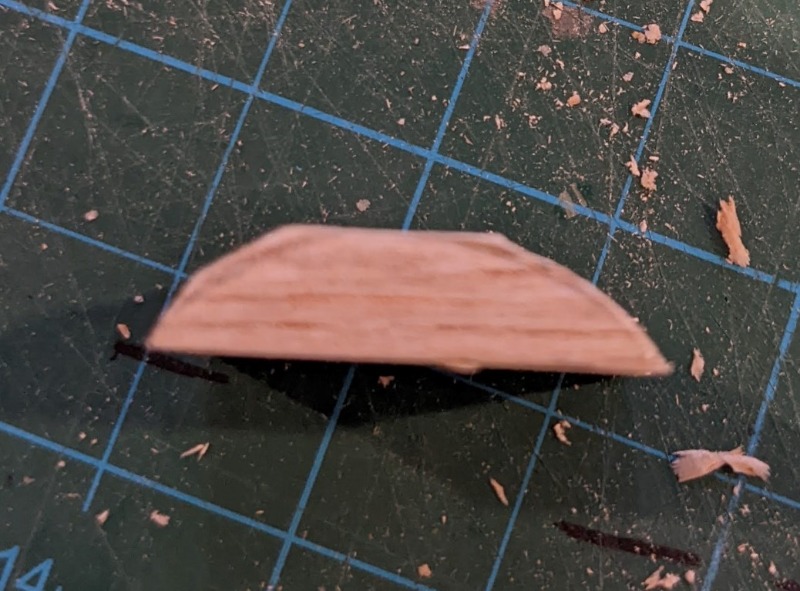
Step 3: Sand the block to the lines, checking in a body tube until a conformal fit is achieved.
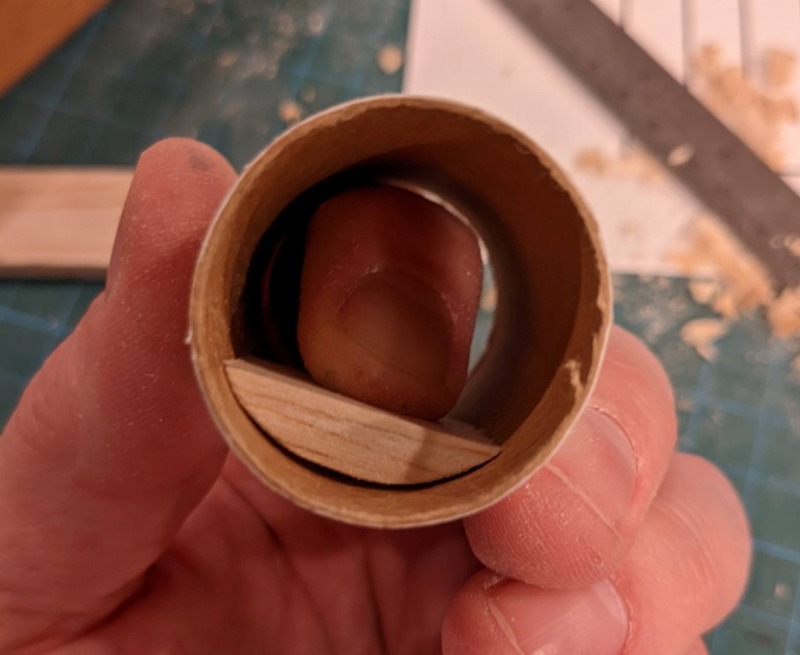
Step 4: Find center of the block by tracing lines from corner to corner, and drill a small diameter pilot hole by hand.
Step 1: Take a 1/4" thick scrap of balsa about 1 inch deep and trace a tube coupler outline on the thin edge of each side.
Step 2: Rough shape the block using an exacto knife to whittle away material close to the line
Step 3: Sand the block to the lines, checking in a body tube until a conformal fit is achieved.
Step 4: Find center of the block by tracing lines from corner to corner, and drill a small diameter pilot hole by hand.
Attachments:
Please Log in or Create an account to join the conversation.
- hermanjc
-
Topic Author
- Offline
- Senior Member
-
Less
More
- Posts: 45
- Thank you received: 7
2 years 2 months ago #11008
by hermanjc
Replied by hermanjc on topic Custom captive nuts for 1010 Rail Button Mounting
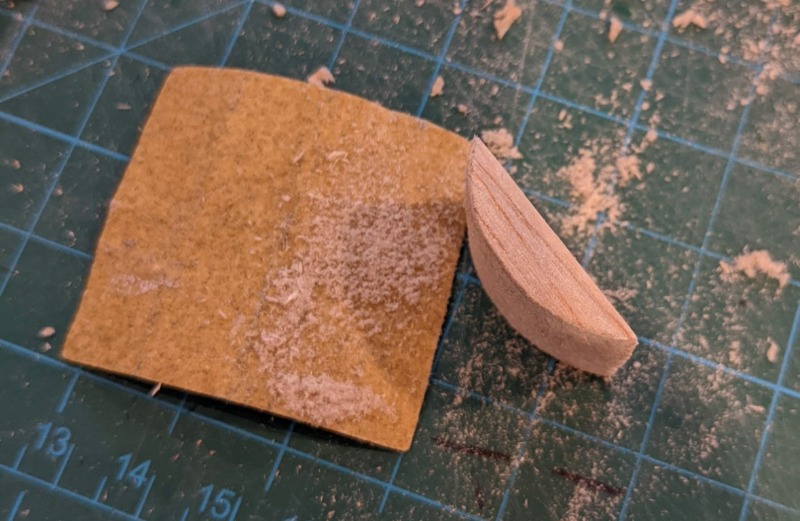
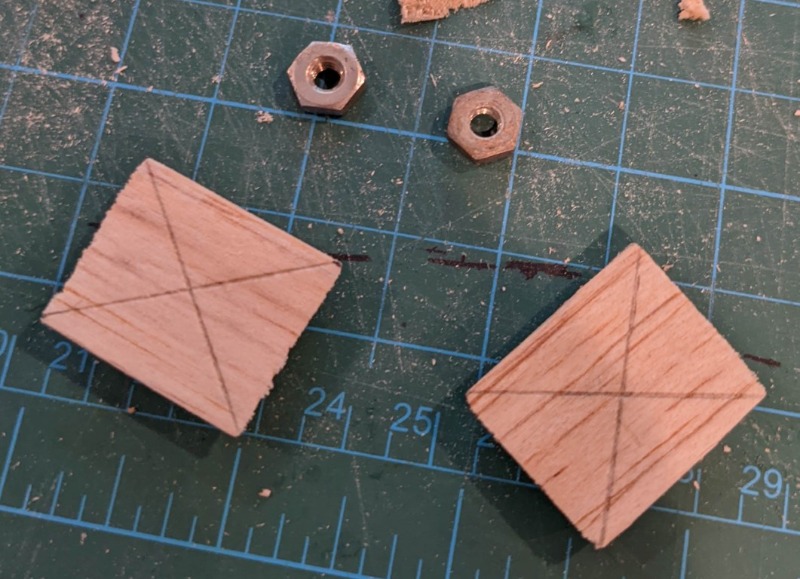
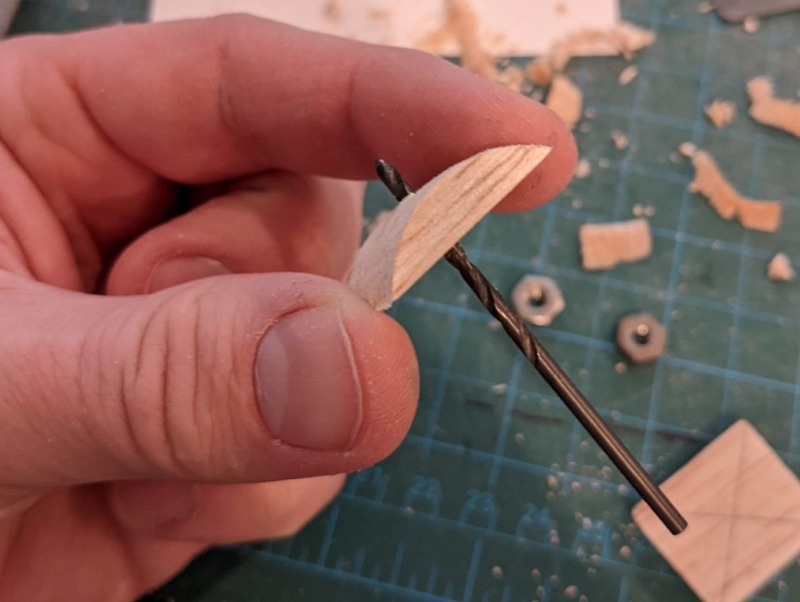
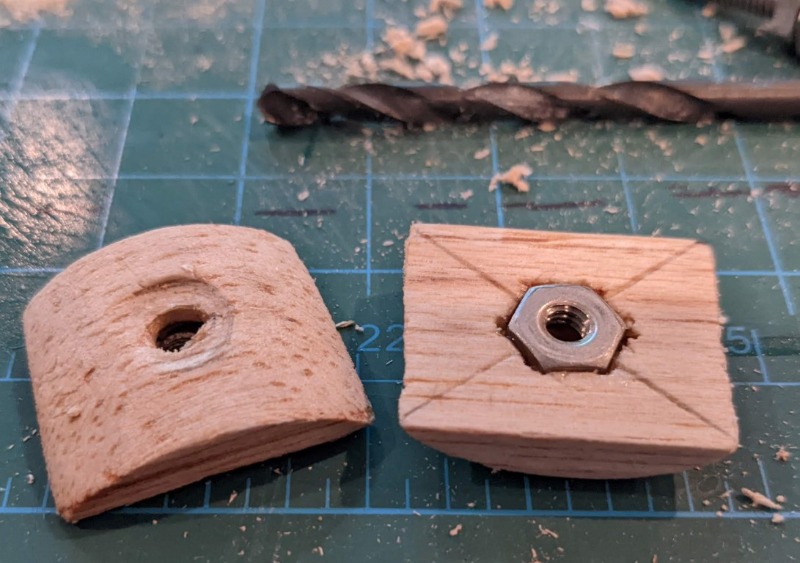
Step 5: Trace the nut needed (in my case #8-32) over the centered hole. Use an exacto knife (square chisel tip if you have one) to carve out a cavity for the nut to sit in so that it is flush when inserted. Use drill bit to enlarge the pilot hole into a clearance hole for the screw that will be used to mount the rail button.
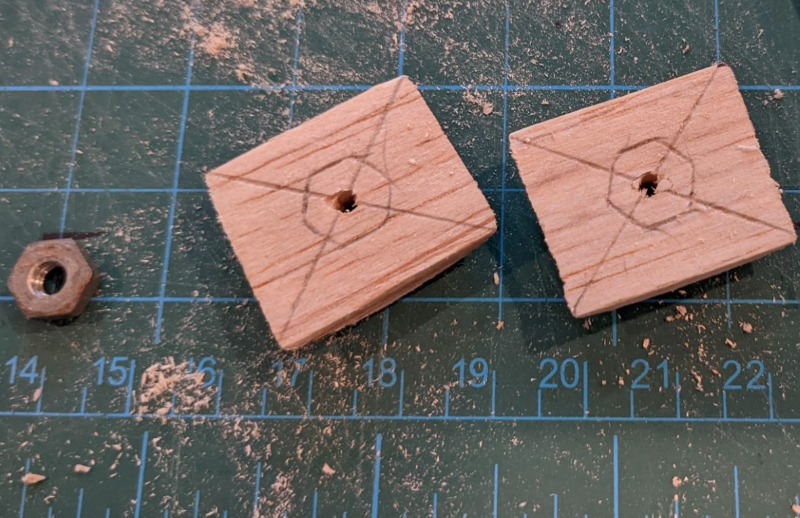
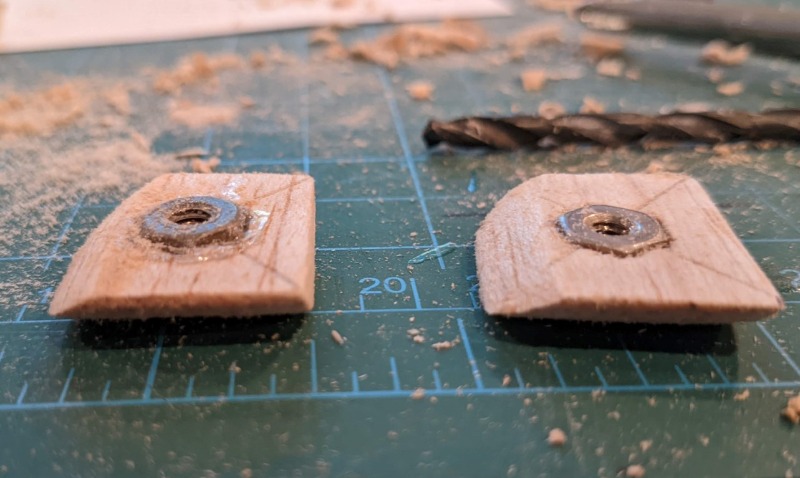
Step 6: Use CA Glue (superglue) to install the nut in place. I found it easiest to thread the nut partially onto a longer screw, and apply the glue to the 6 sides of the nuts, then push it in place.
Step 7: Round/bevel one or both ends of the balsa to eliminate tangle points for any wadding or parachute lines.
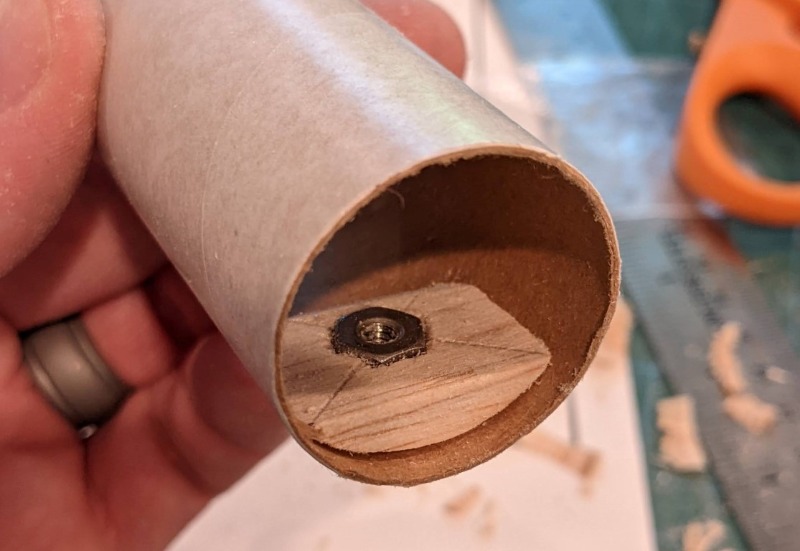
Step 8: Check fit in body tube. Once I am happy with it, I mark and predrill the rail button location on the body tube. Then I use masking tape at the end of a dowel to hold the balsa nut block, apply wood glue and guide it down the tube to the location and install a rail button in order to pull the block against the tube and allow it to dry.
Hope some of you can find this useful!
-Jeremy
Step 6: Use CA Glue (superglue) to install the nut in place. I found it easiest to thread the nut partially onto a longer screw, and apply the glue to the 6 sides of the nuts, then push it in place.
Step 7: Round/bevel one or both ends of the balsa to eliminate tangle points for any wadding or parachute lines.
Step 8: Check fit in body tube. Once I am happy with it, I mark and predrill the rail button location on the body tube. Then I use masking tape at the end of a dowel to hold the balsa nut block, apply wood glue and guide it down the tube to the location and install a rail button in order to pull the block against the tube and allow it to dry.
Hope some of you can find this useful!
-Jeremy
Attachments:
The following user(s) said Thank You: guyw, tlainhart
Please Log in or Create an account to join the conversation.
- curtisheisey
-
- Offline
- Elite Member
-

Less
More
- Posts: 167
- Thank you received: 8
2 years 2 months ago - 2 years 2 months ago #11012
by curtisheisey
Replied by curtisheisey on topic Custom captive nuts for 1010 Rail Button Mounting
Jeremy, I'm impressed with your woodworking skills, patience and tenacity to detail.
I am not a patient person when it comes to precise alignments in word working. My approach is to hit it with a sledge hammer ... CAD tools and 3d printing.
I am not a patient person when it comes to precise alignments in word working. My approach is to hit it with a sledge hammer ... CAD tools and 3d printing.
Last edit: 2 years 2 months ago by curtisheisey.
Please Log in or Create an account to join the conversation.
- hermanjc
-
Topic Author
- Offline
- Senior Member
-
Less
More
- Posts: 45
- Thank you received: 7
2 years 2 months ago #11013
by hermanjc
Replied by hermanjc on topic Custom captive nuts for 1010 Rail Button Mounting
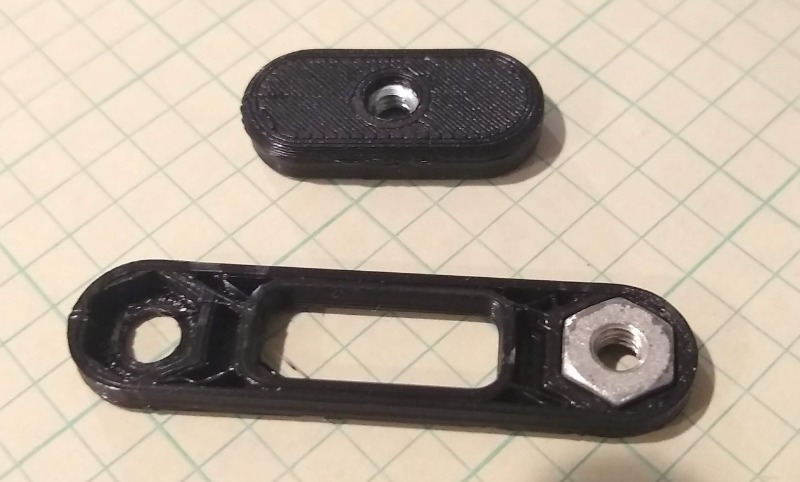
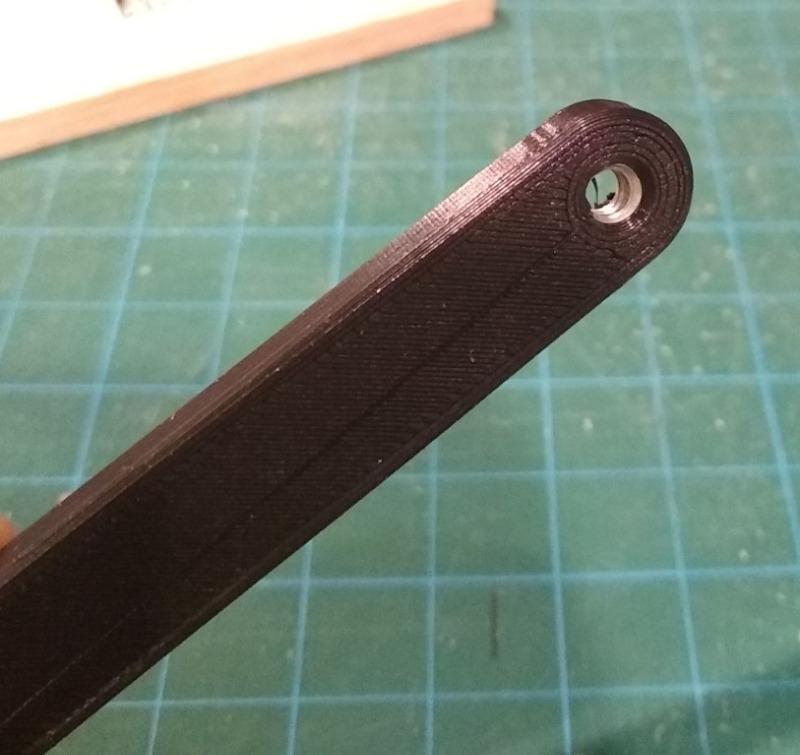
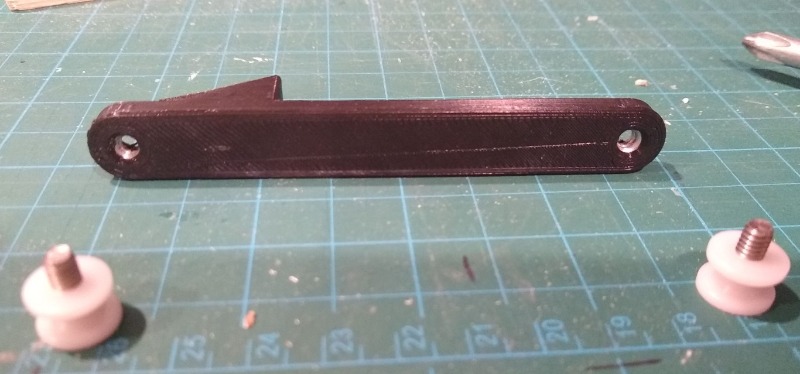
Thank you for the kind words. Honestly balsa is so easy to work and CA cures so quick that the whole process of making two of these blocks takes less than 10 minutes. But, I also like the sledge hammer approach in certain moments, and absolutely live in the CAD world and 3D Printing too! In fact I have also implemented 3d printed captive nut rail button mounts by using pause layers and dropping in the nut before finishing the print, but not sure how to make a tutorial on that one

Attachments:
Please Log in or Create an account to join the conversation.
Login
Search
Weather forecast by: