When writing an article for the CMASS website sometimes you will want to link in an image.
Here are instructions on how to do that.
To add an image:
- First upload the image to the gallery or if you have access to the backend of the website, to the media area.
PLEASE NOTE: These images will be shown on the home page of the website and if you use a large image it will cause problems so please keep the width of the image to 500 px and the image size to well below 75 K. - In the article editor first place the curser in the spot you want the image.
- click on the little icon on the bottom row of icons called 'Insert/Edit Image'.
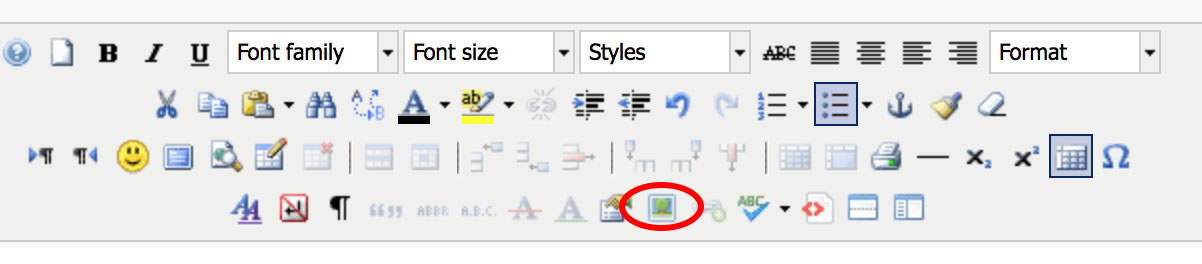
- in the properties for the image:
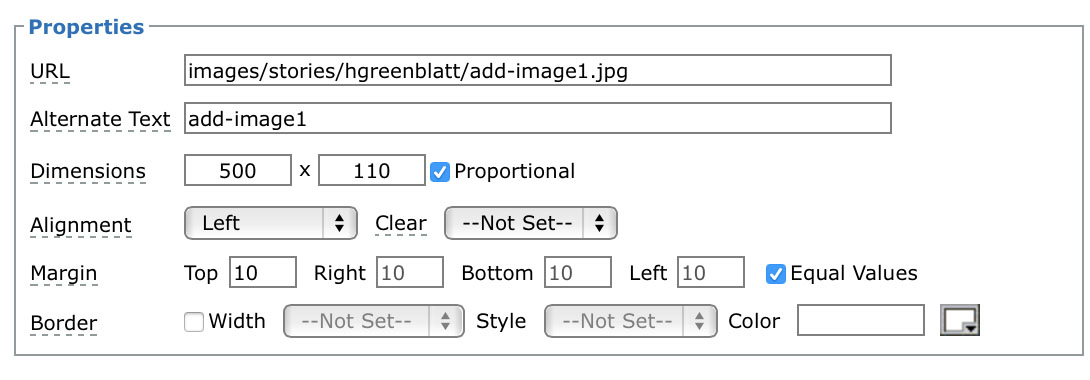
- For the URL, copy the URL of the image from the gallery or select an image from the media area of the backend of the website. For example:
http://www.cmass.org/index.php?view=image&format=raw&type=orig&id=19&option=com_joomgallery&Itemid=68
It will automatically remove the "http://www.cmass.org" part because it is on the same website.
If you want to link to an image on another website that's fine as well, just PLEASE keep the images small. - Add whatever you like for the alternate text, or just use the name of the image.
- For dimensions put 500 in the left (horizontal dimension) so it does not make the image wider than the available space and keep proportional checked.
- Alignment you can set to top or left or what ever looks best in your article.
- You can add a margin or border if you like.
- For the URL, copy the URL of the image from the gallery or select an image from the media area of the backend of the website. For example:
Here is an example:
- You don't usually need to do anything with the other two tabs "Rollover and Advanced".
- If you need to go back and modify the image settings, highlight the image by clicking on it once and then click on the "Insert/Edit Image" button again. The button should be highlighted to indicate there is already an image there.
- Click the Apply button in the upper right of the edit article page to save the article and continue editing.
- Click the Save button to save the article and exit.
- Clicking Close will close the editing session without saving.
- You can also click the Preview button to see what it will look like.
- Email This email address is being protected from spambots. You need JavaScript enabled to view it. or post in the forum if you have any issues.