- Details
- Written by Super User
If you have never attended a CMASS launch, this document will give you all you need to know to launch your rocket, be safe, and have a great time.
The Basics
- The front page of the CMASS web site gives info on the upcoming launch, other events as well as useful links. Check the site the day of the launch for the final 'Go/No Go' notice.
- The link for the current launch schedule can be found on the CMASS from page.
- Launch Etiquette information can be found here.
- CMASS launches at two fields: Woodsom Farm in Amesbury and School Street Soccer Fields in Acton. Directions to both sites can be found here.
- Launches are usually 10:00 am to 4:00 pm. But will vary depending on weather and time of year.
- You do not need to be a CMASS or National Association of Rocketry (NAR) member to launch. Launch fee is $5.00 for the day (purchased at the field), or you can purchase a season's pass ($20.00) here. Spectators are always welcome; there is no fee for spectators.
- CMASS abides by the NAR safety codes.
The Launch Fields
- Woodsom Farm is CMASS's main field. It can accommodate motors up to J. The FAA waiver is 3500 ft. Although any flight above 2000 ft. is risky and should not be attempted without recovery via Dual Deploy, Chute Release or something similar. Eleven Low/Mid Power launch pads are set up with one to three High Power pads. High Power launches and any flight above 1000-ft will be suspended if the wind is blowing toward the power lines. Presently, parking is permitted at the launch area. Woodsom Farm has many dog walkers and pedestrians along the path to the launch area. They have right-of-way. So please drive very slowly and let them pass before continuing on. Weather and wind velocity can be viewed by clicking the 'Windy' link located at the bottom of the CMASS front page.
- Acton Field is smaller and can accommodate motors up to G. No High-Power launching is permitted at the field. Eleven Low/Mid Power launch pads are set up. Parking is on School Street next to the soccer field. Weather and wind velocity can be viewed by clicking the 'Windy' link located at the bottom of the CMASS front page and entering 'School Street Fields Acton MA' in the search box.
- There is a Port-a-John at both fields during the flight season supplied by CMASS.
- To get an idea of what the launch fields look like, you can view photos from recent launches in the Gallery.
What To Bring
- Rockets (including recovery components), motors and igniters. No launch equipment is necessary. All launch equipment is supplied by CMASS. Please note, recovery wadding should not be fiberglass insulation.
- Masking tape, super glue (or similar), sandpaper and other items for last minute repairs. Pen or pencil to fill out launch cards.
- Chairs, small folding worktable. This makes it easier to prep rockets for flight.
- Picnic Blanket (or similar) to set your rockets out.
- Bag to take your trash with you at the end of the day.
- Water and food for the day. CMASS sells drinks, hot dogs and snacks at most launches.
- During Summer months - extra water, sunscreen, sunglasses, hat. Many also bring a pop-up. Neither of the fields have any shade and both are usually several degrees hotter than what is predicted for the area in general.
- During Spring and Fall - dress in layers. Woodsom Farm is usually several degrees colder, and the winds are stronger than what is predicted for the area in general.
The Launch Protocol
- A launch card must be filled out for each launch of a rocket. These can be found at the RSO (Range Safety Officer) table or printed beforehand. Fill out the launch card for your rocket. If anything is unclear, just ask the RSO.
- Prep your rocket for launch and bring it, along with the launch card, to the RSO table.
- The RSO will inspect the rocket for safety and assign a launch pad for your rocket.
- Load your rocket onto the launch rod. Be careful NOT to bend the rod and make sure the clips are not touching each other or anything metal. If you are not sure what to do or need help, ask the RSO. He will ask someone to help you load your rocket for launch.
- Stand back the required distance and wait for the LCO (Launch Control Officer) to launch your rocket.
Retrieve your rocket and do it all over again. - Please do NOT enter the circle of launch pads. There are a lot of wires there and it is very easy to trip on one, possibly injuring yourself or causing damage to the equipment. If your rocket lands within the circle, notify the LCO and get permission to enter the circle to retrieve your rocket.
- If your rocket lands beyond the launch field and on someone's property, do NOT walk onto the property to retrieve your rocket. Knock on the house door and ask the owner's permission to retrieve your rocket. It is very important that we respect the privacy and property rights of the homeowners adjacent to the launch fields.
Miscellaneous
- If you find a lost rocket, bring it to the RSO table. They will make an announcement.
- If you come upon a rocket that has just landed, let the owner retrieve it. Many owners want to inspect their rockets for damage before they pick it up.
- Dogs are welcome, but they must be on a leash while at the launch.
- Children are always welcome, but please have them walk and not run while at the launch.
- Set up and take down of the launch equipment is a lot of work and we always welcome help. Don't worry about not knowing what to do. Everyone is friendly and willing to teach.
- Feel free to roam around and look at the different fleets and ask questions. Everyone is friendly, willing to help and love to talk about their rockets.
- Details
- Written by CMASS Admin
When writing an article for the CMASS website sometimes you will want to link in an image.
Here are instructions on how to do that.
- First upload the image to the gallery or if you have access to the backend of the website, to the media area.
PLEASE NOTE: These images will be shown on the home page of the website and if you use a large image it will cause problems so please keep the width of the image to 500 px and the image size to well below 75 K. - In the article editor first place the curser in the spot you want the image.
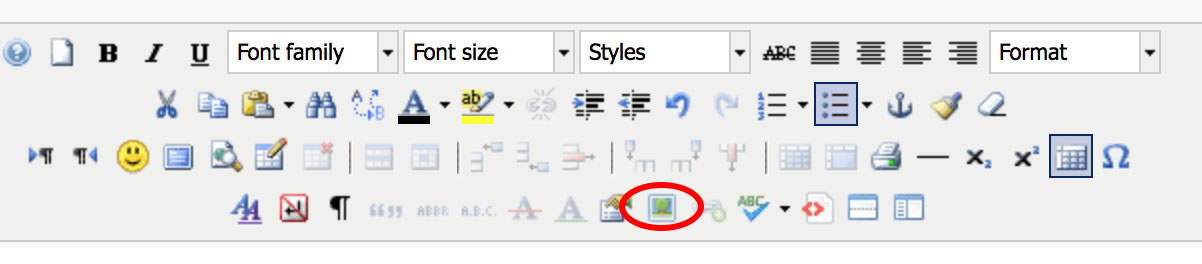
- click on the little icon on the bottom row of icons called 'Insert/Edit Image'.
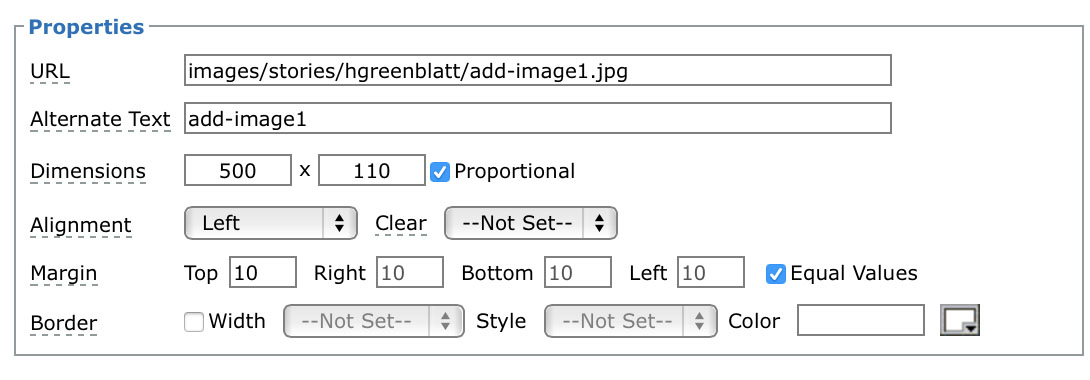
- in the properties for the image:
- For the URL, copy the URL of the image from the gallery or select an image from the media area of the backend of the website. For example:
http://www.cmass.org/index.php?view=image&format=raw&type=orig&id=19&option=com_joomgallery&Itemid=68
It will automatically remove the "http://www.cmass.org" part because it is on the same website.
If you want to link to an image on another website that's fine as well, just PLEASE keep the images small. - Add whatever you like for the alternate text, or just use the name of the image.
- For dimensions put 500 in the left (horizontal dimension) so it does not make the image wider than the available space and keep proportional checked.
- Alignment you can set to top or left or what ever looks best in your article.
- You can add a margin or border if you like.
- For the URL, copy the URL of the image from the gallery or select an image from the media area of the backend of the website. For example:
Here is an example:
- You don't usually need to do anything with the other two tabs "Rollover and Advanced".
- If you need to go back and modify the image settings, highlight the image by clicking on it once and then click on the "Insert/Edit Image" button again. The button should be highlighted to indicate there is already an image there.
- Click the Apply button in the upper right of the edit article page to save the article and continue editing.
- Click the Save button to save the article and exit.
- Clicking Close will close the editing session without saving.
- You can also click the Preview button to see what it will look like.
- Email This email address is being protected from spambots. You need JavaScript enabled to view it. or post in the forum if you have any issues.
- Details
- Written by Howard Greenblatt
Never been to a rocket launch before?
Visiting from out of town but you left your rockets home?
We can help.
CMASS has a collection of loaner rockets and engines that have been donated to the club. Just ask someone who looks official and we’ll help you get into the air.
- Details
- Written by Howard Greenblatt
If you’ve never been to a CMASS launch before there are a few basic things you should know that will make the event enjoyable and safe for you and everyone else.
The Range Safety Officer (the person at the safety check table) and the Launch Control Officer (the person who pushes the button) are the ultimate authority on the range. Their job is to make sure the launch is conducted safely. It is essential that you do what they say.
The area inside the circle of pads is covered with wires. Please do not walk in there unless the LCO gives you permission.
If you hear “heads up” it means something is coming out of the sky in an unsafe manner. Pay attention and, if you see the object in question, point to it so others will be aware.
Do not pick up someone else's rocket. There are some obvious exceptions to this rule. If the rocket is in the middle of the road or you’ve found it in some difficult to access place retrieving it will be appreciated.
Please bring your children to the launch. They are the future of the hobby and we want them there. But please make them understand they are there to watch and participate in a rocket launch. They are not there to play soccer, or football, or tag, or Frisbee, or Nerf arrows, or chase-the-dog.
Our continued use of the fields we fly on depends on keeping good relations with the neighbors. That means asking permission to enter someone’s yard to retrieve your rocket, giving the pedestrians and dog walkers the right of way on the road, and following the parking rules.
- Details
- Written by CMASS Admin
Forum Help
Since you are reading this page then it is safe to say to that you already know basic website navigation such as typing web addresses, clicking through links and maybe even watching or listening to multimedia. That's great! What we'll do here is try to familiarise you with how to use our forum and its many options.
When you get done reading this you will be able to reply to existing posts as well as make new posts. You will know how to format your text, make links, add images and videos and much more. We're not going to teach you how to use every little button, gizmo or forum feature but rather provide you sufficient working knowledge to feel comfortable enough to get involved here in the forum. After that, you can do a sleuthing around to learn what the rest of the goodies do.
Set up your profile
When you find a community and forum that you like and plan on staying with for a while it is a good idea to set up and complete your profile. You access your profile by clicking 'My Profile' located at the top of the forum. This area is not much different than any other form you have filled out online or in real life except that much of the information in here is optional.
Personal Info
- Summary - All your settings from other tabs summarized.
- Edit Your Details - Edit your login name, email address and password.
- My Avatar - Select an avatar from those available or upload your own image. If you upload your own image, you can upload an image up to 250 x 250 pixels and 50 kilobytes. The forum will automatically scale the image for use in various locations.
Forum Settings
- Look and Layout - Tweak a few forum appearance settings.
- My Profile Info - Fill in personal information that you don't mind sharing publicly. This is also where you fill out your forum signature.
- My Posts - List of your posts ordered by most recent. Handy for finding a post that you don't recall which board you posted it in.
- My Subscribes - List of topics that you have subscribed to send you an email notification for all new responses.
- My Favorites - List of topics that you have ticked as a favourite of yours so they are more easily identifiable in the forum list.
- Remember to press the 'Save' button any time you make changes in your profile.
Reply to an existing post
So, you have been lurking around the forum for a while reading every post and getting to know everyone. You have just read someone's post and you have finally decided you are going to reply and contribute some information of your own. Great! This is done by pressing one of the 'reply' buttons.
- Quick Reply - this brings up a small text area (without reloading the webpage) where you can quickly type a short reply. Press 'Submit' when you are done typing your response. If you have a change of heart you can press cancel and nothing gets posted regardless if you typed anything or not.
- Reply - This is the standard method in which you should reply when you want to reply primarily to the most recent post. The reason for this is because the subject line of your reply will autofill with the subject of the post from which you are replying. In case you were wondering, yes, you can change the subject. OK, now you are looking at what is called a text editor. Think of it as a slimmed down version of a word processor (such as Microsoft Word) in which you can format your text, add links, images, smilies, etc. More on how to format your post later. For now, type your response and press the 'Preview' button at the bottom of the page if you wish to view your post prior to submitting it. When you are done editing and are satisfied your post is ready to contribute to the forum then press the 'Submit' button.
- Quote - If you wish to quote someone's post whether in whole or in part you simple press the 'Quote' button located beside the 'Reply' button underneath each post. The is very useful if you wish to make light of or expand upon a prior post. Once you press the Quote button you are brought into the same editing environment that you use to edit or create any other post. At this point, you type your response directly to that quote. When you are done replying, press the 'Submit' button.
- Reply Topic - This button functions the same as the 'Reply' button with the exception that your subject line will autofill with the subject of the original post (OP). This may come in handy if you replying to a long post whose subjects may have changed over time but you want to reply to the OP. When you are done replying, press the 'Submit' button.
Create a new post of your own
Now that you have responded to a few other posts, and feel like an accepted member of the community, you want to tell us a little bit about yourself. To do this, you should start your very own topic so we can properly respond and greet you. Navigate to our General board and click on it so that you can see the list of all of the existing posts. At the top of the list is a button labelled 'New Thread'. Click that button to start your very own topic. You are placed at the same text editor that you used earlier when replying to posts. Simply type your message telling us all about yourself and press 'Submit'. Now you have your own post topic in the list.
Format your post
Remember we said earlier that the text editor is very similar to a word processor? Well, as in any word processor you can format and arrange your text for emphasis here in the forum.
The first, basic thing you should know is that the forum uses what's called BBcode or Bulletin Board Code. BBcode uses 'tags' to 'mark up' your text. Each 'tag' has an opening and closing 'tag' denoted within brackets. An opening tag will look like [ ] and a closing tag looks like [/ ]. Notice the slash in the closing bracket is the only thing that is different. If you forget the slash, the forum will interpret your closing bracket as an opening bracket.
The easiest way to 'mark up' your text is usually to type it out first, then select it, and press the appropriate button at the top of the editor. For example, if you wanted to make 'some text' bold you would type it out 'some text', then select 'some text' with your mouse, and then press the 'B' icon in the toolbar located just above the Message area (where you are composing your message). You will now see: [b]some text[/b]. When you preview or submit your message it will be displayed as 'some text'. Alternatively, if you know them, you can type the tags manually right along with the rest of your text or you can use the buttons at the top of the editor to insert the tags the fill in your text.
The BBcode Wiki covers the basic mark up tags so let's move on to what the Wiki doesn't cover.
Lists
There are two types of lists: ordered and unordered. An ordered list is a numerical list like you might use to list the finishing order of a race. An unordered list is a list you might use to list groceries. There are two different tags needed to create a list.
First, you use a tag that creates the kind of list you want.
[ul] [/ul] = unordered list [ol] [/ol] = ordered list
Second, you use a list tag for each item in the list
[li] [/li] = each list item.
So, the code for an ordered list would look like this:
[ol] [li] 1st place[/li] [li] 2nd place[/li] [li] 3rd place[/li] [/ol]
Videos
Embedding a video in your post is a more recent addition to the forum and makes use of many video sharing websites on the web. This gives us the ability to show the video in our forum without having to host it ourselves or making you follow a link over some other website to see the video. Once you have a video that you want to post you need to find the unique identifier in the URL to that video.
It's difficult to provide detailed instructions or examples here, so we'll only cover the basics. Understand that each video sharing website uses a unique identifier for each video. For example, this video from YouTube whose URL is http://www.youtube.com/watch?v=bqJE5TH5jhc. You need to know the video's unique identifier (which differs depending on what site you visit); in our example, the unique identifier is bqJE5TH5jhc. Once you know what that unique identifier is you can embed that video in our forum by selecting the video hosting website from the 'video' drop down list at the top of the WYSIWIG editor pr typing the following:
[video type=] [/video]
If you were embedding a video from YouTube, for example, the bbcode would end up looking like this:
[video type=youtube] insert_unique_identifier_here [/video]
for example
[video type=youtube] bqJE5TH5jhc [/video]
It's a good idea to preview your post to make sure the video is visible before submitting your completed post.
Edit your own post
There will be times when you make a post and you don't catch a misspelled word, fix a broken link or something that will require you to edit you post. It happens to us all so the edit button is easily accessible. When you are looking at one of your own posts that you need to edit you will find the 'Edit' button at the bottom of your post. Simply press the edit button and you use the same editor you used to create your post populated with the actual post. Edit your post as you see fit and, when you are satisfied, press the 'Submit' button at the bottom of the page. All done!
Visibility and notification of your favorite posts
Now that you have settled into your new community and everyone has met you, you want to be able to keep up with your favorite posts without checking in every five minutes to see if something new has posted. There a couple of ways that you can do that.
Subscribe
At the top and the bottom of every thread you will find the 'Subscribe' button. Pressing this button subscribes you to that topic so that any responses to that topic will generate an email notification to your email address stating that a new post has been made along with a link directly to said post for your convenience. You will notice the button now reads 'Unsubscribe' indicating that you are subscribed and pressing the button again will remove your subscription to that thread. Remember that you can also manage your subscriptions in your profile.
Favourite
Another way of gaining visibility of threads that wish to keep an eye on is set them as your 'Favorite'. This will place an obvious indicator, such as a star, beside the topic name of the thread so that it will stand out in the forum list of topics. You will notice the button now reads 'Unfavorite' indicating that the post is already one of your favourites and pressing the button again will remove it from your favourites. This is a great way to get visibility on multiple topics that you wish to watch without getting spammed by email subscriptions. Remember that you can also manage your favourites in your profile.
The Karma System
The karma system is one of those neat little things that contributes to the community aspect of a website by empowering you to give feedback to those who deserve it. It is a tool you can use to show appreciation or disapproval for anything that another member has done.
Maybe you posted for help on how to do something and got such a swift and helpful response from another member that you want to show appreciation in more than just words. You can applaud them by giving them Karma. Perhaps another member responded to that same post negatively offering no help and unnecessarily making you look foolish when you genuinely needed help. You can smite them by take away Karma. However, should you smite someone, you should follow that up with a message to an admin or moderator and let them know just in case there is a larger issue.
Please use the karma system responsibly. Don't abuse it by artificially inflating someone's karma or waging a personal war against someone by reducing their karma unnecessarily. If abuse is detected the karma system will be shut off as it is not a necessity.
The karma controls are located in the top, right of each post we make in the forum. The '+' sign adds karma and the '-' takes it away. You cannot adjust your own karma.
Conclusion
Now that you know how to create your own posts, edit them, set notifications, etc, you are ready to explore the rest of the forum. Don't be afraid. Go click things and see what they do. If something 'breaks' or you don't understand how to use something make a post in the forum and ask for help.